Let's start with a simpe noise generator function that creates rough noise - just random numbers. We'll normalize the numbers so they're in the range 0.0 to 1.0.
There are lot of various ways of doing this - worth looking into
chaos theory
if this facinates you!
Simple 2d noise function
A popular noise function is one that mixes trignometric functions with large values - the values are so large and wrap around that they create a chaotic pattern which we can sample from using a seed value (offset).
If we write a simple fragment shader for a full screen quad, we can take a look at this noise - color each pixel using the value as an rgb color (grayscale) using the uv coordinates as the seed.
@fragment
fn main(@location(0) fragCoord : vec2<f32>) -> @location(0) vec4<f32>
{   // generate random number
    var randomNumber = random(fragCoord);

    // Use random number for fragment color (for demonstration)
    var color: vec3<f32> = vec3<f32>(randomNumber); // Use the random number for RGB values

    // Output final color
    return vec4<f32>(color, 1.0);
}
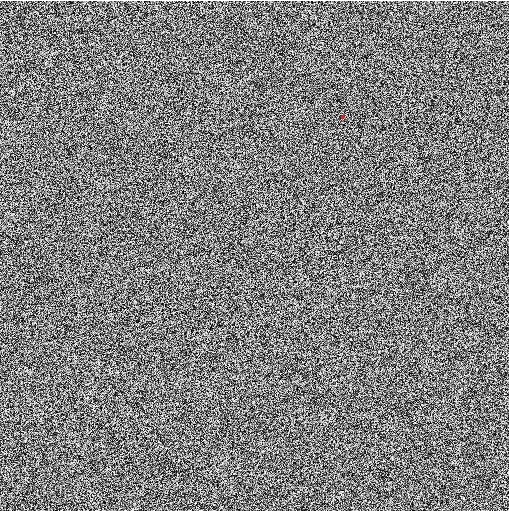
The output isn't very exciting - just lots of randompixels - looks like static noise you'd see on an old tv!
Random pixels with no correlation or pattern.
In fact, you can add an 'offset' to the uv coordinates so it contantly changes (e.g., create a uniform timer called `mytimer`) which we increment each frame.
var randomNumber = random(fragCoord + mytimer);
This will cause the pixels to constantly change - it doesn't look very nice for pure random pixels as we've got now - but later on as our noise becomes smoother it'll look nicer.
Grayscale to Color
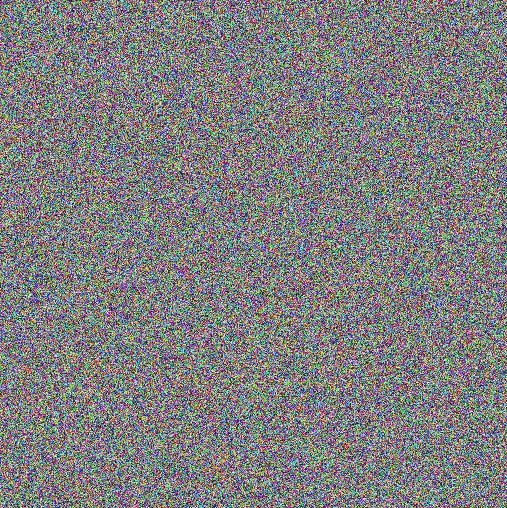
We're also using the same random number for the rgb values - this gives us a grayscale noise - but if we use an offset for each of the seed values we can create color noise.
@fragment
fn main(@location(0) fragCoord : vec2<f32>) -> @location(0) vec4<f32>
{   // generate random number - one for each color component
    var randomNumberR = random(fragCoord );
    var randomNumberG = random(fragCoord  + vec2(0.233902,1.390239023)   );
    var randomNumberB = random(fragCoord  + vec2(0.9390323, 0.239023902) );

    // Use random number for fragment color (for demonstration)
    var color: vec3<f32> = vec3<f32>(randomNumberR, randomNumberG, randomNumberB);

    // Output final color
    return vec4<f32>(color, 1.0);
}
The offset values are chosen arbitrarily just to make each of the seeds unique.
Random color pixels - moving beyond grayscale noise.
Smooth out the Noise
Taking things a bit further - we can make the noise a little less harsh - smooth it out a bit by interpolating between values to create a more organic look.
The noise is still the same - however, the noise values are spread out over multiple pixels (interpolate their values).
We'll add an extra function called
randomsmooth(..)
which will use the original
random(..)
function - but smooth the result out.
fn randomsmooth( st:vec2<f32> ) -> f32
{
    var i = floor( st * 4.0 ); // uv - 0,   1,   2,   3,
    var f = fract( st * 4.0 ); // uv - 0-1, 0-1, 0-1, 0-1

    // Four corners in 2D of a tile
    var a = random(i);
    var b = random(i + vec2<f32>(1.0, 0.0));
    var c = random(i + vec2<f32>(0.0, 1.0));
    var d = random(i + vec2<f32>(1.0, 1.0));

    // Ease-in followed by an ease-out (tweening) for f
    // f = 0.5 * (1.0 - cos( 3.14 * f ) );
    // version without cos/sin
    // f = 3*f*f - 2*f*f*f;

    f = 3*f*f - 2*f*f*f;

    // bilinear interpolation to combine the values sampled from the
    // four corners (a,b,c,d), resulting in a smoothly interpolated value.

    // Interpolate Along One Axis - interpolate between 'a' and 'b' using the fractional coordinate 'f.x',
    // then interpolate between 'c' and 'd' using the same 'f.x'.
    // This gives two intermediate values, say `e` and `f`.

    // Interpolate Along the Other Axis - linearly interpolate between 'e' and 'f'
    // using the fractional coordinate 'f.y'.
    // Final interpolation gives a moothly interpolated value across the square

    var x1 = mix( a, b, f.x );
    var x2 = mix( c, d, f.x );

    var y1 = mix( x1, x2, f.y );

    return y1;
}


@fragment
fn main(@location(0) fragCoord : vec2<f32>) -> @location(0) vec4<f32>
{
    var randomNumber = randomsmooth(fragCoord );

    // Use random number for fragment color (for demonstration)
    var color: vec3<f32> = vec3<f32>(randomNumber);

    // Output final color
    return vec4<f32>(color, 1.0);
}
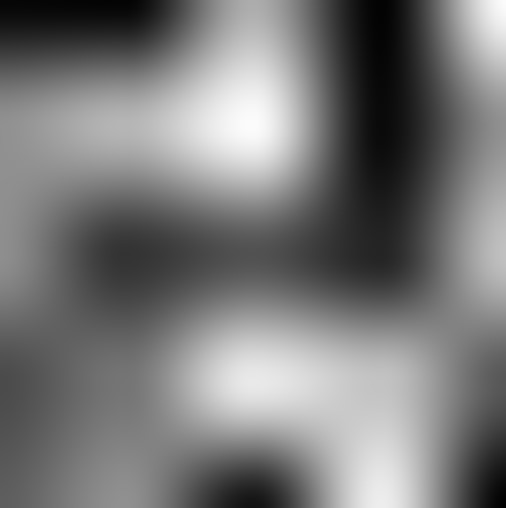
As before we'll plot the pixel values for the smooth noise using the uv coordinates as the seed.
Smoothing noise using the smoothnoise function by interpolating between noise values.
The secret to the smooth noise function is the first two lines:
var i = floor( st * 4.0 ); // uv - 0,   1,   2,   3,
var f = fract( st * 4.0 ); // uv - 0-1, 0-1, 0-1, 0-1
These two lines convert the uv coordinates into integers and floating point values. We scale them to get a denser noise pattern - using
uv
without scaling - means the integer would only be
0-1
for the full screen. But multipling it by 4 means the full screen has 4 numbers - 4 random number which we interpolate the values inbetween using the repeating floating point value.
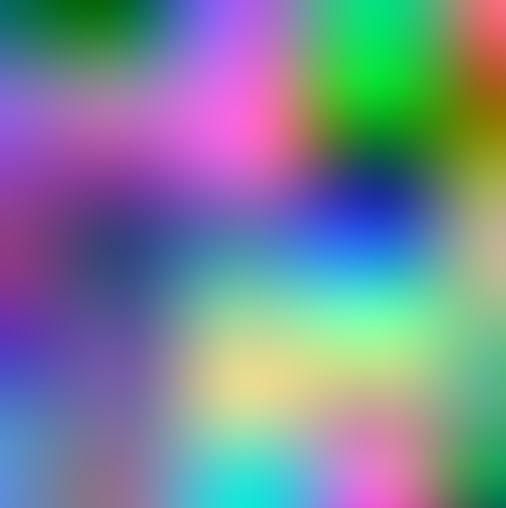
Color Smooth Noise
We can repeat what we did earlier for the color noise - by adding offsets for the rgb value to create color smooth noise
@fragment
fn main(@location(0) fragCoord : vec2<f32>) -> @location(0) vec4<f32>
{   // generate random number - one for each color component
    var randomNumberR = randomsmooth(fragCoord );
    var randomNumberG = randomsmooth(fragCoord  + vec2(0.233902,1.390239023)   );
    var randomNumberB = randomsmooth(fragCoord  + vec2(0.9390323, 0.239023902) );

    // Use random number for fragment color (for demonstration)
    var color: vec3<f32> = vec3<f32>(randomNumberR, randomNumberG, randomNumberB);

    // Output final color
    return vec4<f32>(color, 1.0);
}
Color smooth noise.
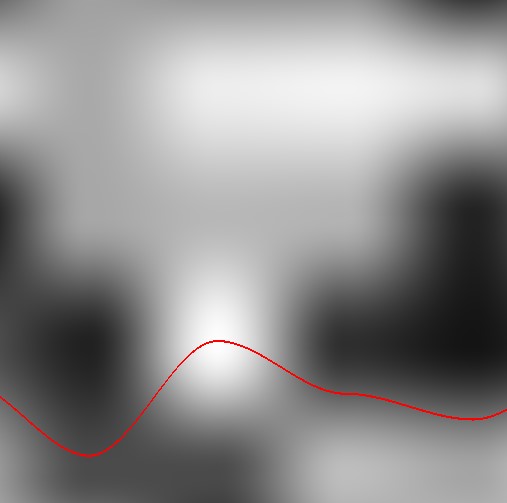
Plotting a Slice of the Noise (1d slice)
While a top down view of the noise looks good - it'd be nice to see a height plot of a slice of the noice - imagine turning the noise on it's side and taking a slice. See how it changes in height (magnitude differences).
We just take a
constant
horizontal texture coordinate value - to get the height change for that slice. We then draw it on top - so we can see the 2d noise in the background - but draw a 1d slice of it on top as a plot.
@fragment
fn main(@location(0) fragCoord : vec2<f32>) -> @location(0) vec4<f32>
{
    // Add 'mytimer' to make the noise constantly change
    var randomNumber = randomsmooth(fragCoord + mytimer );

    // Use random number for fragment color (for demonstration)
    var color: vec3<f32> = vec3<f32>(randomNumber);

    // Height plot for a single slice of the noise
    let lineThickness = 0.002; // thickeness line for the noise
    let lineHeight    = 0.5;   // max line height half screen height
    let lineSlice     = 0.2;   // cut across the noise at 0.2 value

    let x = fragCoord.x;
    let y = randomsmooth( vec2(x, lineSlice) + mytimer )*lineHeight;

    if ( length( fragCoord - vec2<f32>(x,y) ) < lineThickness )
    {
        color = vec3<f32>(1,0,0);
    }

    // Output final color
    return vec4<f32>(color, 1.0);
}
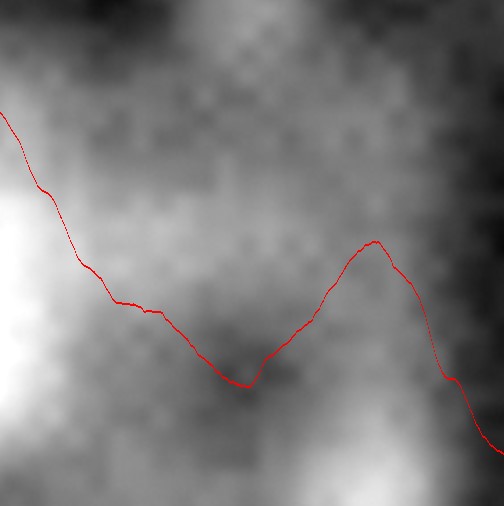
Plotting a slice of the noise on top to see the height variation pattern (as a magnitude).
Looking at the Noise Steps
If you want, you can add in a little hack to the smooth noise generator function - so the repeating '0..1' value - hard code it so it doesn't change. This lets you see the fixed value numbers from the random noise generator (without being interpolated).
// Comment this line out
// fract( st * 4.0 ); // uv - 0-1, 0-1, 0-1, 0-1
// Change it to use a constant value of '0.2' or some other constant (between 0 to 1)
var f = vec2(0.2);
Visualizing the smooth noise step values that are intepolated to create the final smooth noise values.
Fractal Noise (Fractal Brownian Noise or fbn)
We're going to take things further by adding fractal noise to the mix! One particular type of noise called fractal brownian noise lets us build on what we've done up to now - we can combine multiple layers of noise to create different noise patterns (organoic noise patterns that we'd see in nature).
The Fractal Brownian Noise (FBN) function (called fbn) is given below - which will generating noise using multiple octaves and combining them to produce a beautiful fractal-like result.
fn fbn(st: vec2<f32>, octaves: u32, lacunarity: f32, gain: f32) -> f32 {
    var amplitude: f32 = 1.0;
    var frequency: f32 = 1.0;
    var value: f32 = 0.0;

    for (var i: u32 = 0u; i < octaves; i = i + 1u) {
        value = value + amplitude * smoothnoise(st * frequency);
        frequency = frequency * lacunarity;
        amplitude = amplitude * gain;
    }

    return value;
}
Suddenly our simple noise function has all these extra input parameters!
•
st
: The 2D coordinate for sampling the noise (i.e., seed value)
•
octaves
: Number of layers of noise to combine.
•
lacunarity
: How the frequency changes between octaves (e.g., doubling frequency).
•
gain
: How the amplitude changes between octaves (e.g., halving amplitude).
We can adjust these parameters to create all sorts of different fractal noise patterns! Exciting?
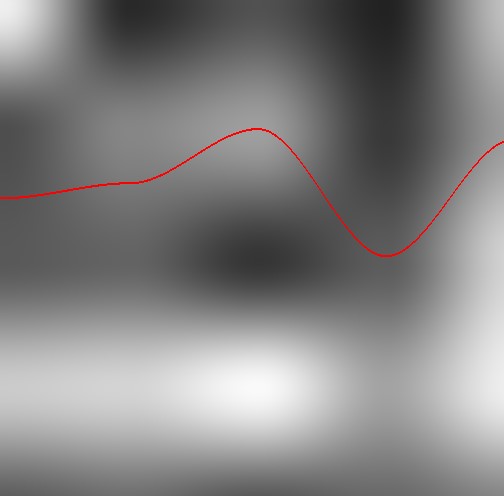
Lets modify the fragment shader to plot the output using our new fbn function. We need to add in a few
clamp
values - as the fbn noise function can create output greater and less than 1.0 for our input paramters. So the output stays within 0 to 1 we just clamp the values.
This is the fragment shader using the fbn noise function - the default values are just 1 for the inputs. It produces an output noise the same as the base noise (i.e., smooth noise pattern) - as shown below.
@fragment
fn main(@location(0) fragCoord : vec2<f32>) -> @location(0) vec4<f32>
{
    let octaves:u32    = 1;
    let lacunarity:f32 = 1.0;
    let gain:f32       = 1.0;
    var randomNumber = fbn(fragCoord + mytimer, octaves, lacunarity, gain );
    randomNumber = clamp(randomNumber, 0.0, 1.0);

    // Use random number for fragment color (for demonstration)
    var color: vec3<f32> = vec3<f32>(randomNumber);

    // Height plot for a single slice of the noise
    let lineThickness = 0.002; // thickeness line for the noise
    let lineHeight    = 0.8;   // max line height half screen height
    let lineSlice     = 0.2;   // cut across the noise at 0.2 value

    let x = fragCoord.x;
    var y = fbn( vec2(x, lineSlice) + mytimer, octaves, lacunarity, gain  );
    y = clamp( y, 0.0, 1.0 ) * lineHeight;

    if ( length( fragCoord - vec2<f32>(x,y) ) < lineThickness )
    {
        color = vec3<f32>(1,0,0);
    }

    // Output final color
    return vec4<f32>(color, 1.0);
}
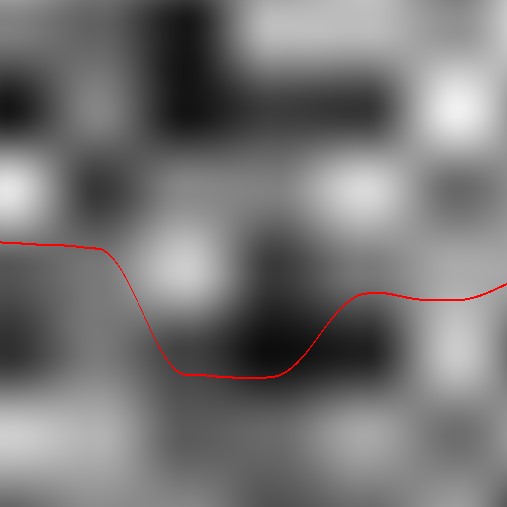
Fractal brownian noise function - with default simple values (noise values octave:1, lacunarity:1, gain:1).
Tinkering with FBN Parameters
Make the octave value 2 - we can see it will mangnify the output causing it to saturate and clip against the 1.0 ceiling.
<?php
    let octaves:u32    = 2;
    let lacunarity:f32 = 1.0;
    let gain:f32       = 1.0;
Increasing the octave value to 2.
Of course, we can scale the gain parameter down to 0.1 to counter act the saturation effect:
<?php
    let octaves:u32    = 2;
    let lacunarity:f32 = 1.0;
    let gain:f32       = 0.1;
Octabe of 2 and a gain of 0.1.
As you can see, you can tinker with the parmeters to create various noise patterns - sort of like adding lots of control nobs to your noise!
For example modifying the octabe, lacunarity and gain to the following:
<?php
    let octaves:u32    = 12;
    let lacunarity:f32 = 6.0;
    let gain:f32       = 0.1;
Gives the noise pattern:
Fbn parameters for octabes:12, lacunarity:6, and gain 0.1.
Rotation
An important component of noise that is not present up to now, is the spinning or swirling you'd see in organic noise patterns. You often see it in smoke or clouds - they don't move in straight lines - they curl and twist.
So we'll mix in a bit of rotation to our noise functions!
For example, we can create a simple 2d rotation matrix
<?php
let m = mat2x2<f32>(0.80, 0.60, -0.60, 0.80);
Rotate the 2d seed value using multiplication:
<?php
let stnew = st * m;
The new improved fbn function with spin - let's call it
fbnspin(..)
.
fn fbnspin(
    stin: vec2<f32>,
    octaves: u32,
    lacunarity: f32,
    gain: f32,
    offset: f32,         // Offset to adjust noise domain
    distortion: vec2<f32> // Distortion applied to the position
) -> f32 {
    var amplitude: f32 = 1.0;
    var frequency: f32 = 1.0;
    var value: f32 = 0.0;
    var st: vec2<f32> = stin;

    for (var i: u32 = 0u; i < octaves; i = i + 1u) {
        // Apply distortion and offset to the position
        st = st + distortion * sin(st * offset);

        // Sample the noise with the modified position
        value = value + amplitude * randomsmooth(st * frequency);

        // Update frequency and amplitude for the next octave
        frequency = frequency * lacunarity;
        amplitude = amplitude * gain;
    }

    return value;
}

@fragment
fn main(@location(0) fragCoord : vec2<f32>) -> @location(0) vec4<f32>
{
    let octaves:u32    = 5;
    let lacunarity:f32 = 2.0;
    let gain:f32       = 0.01;
    let offset:f32     = 1.5;
    let distortion:vec2<f32> = vec2(0.3, 0.4);

    var randomNumber = fbnspin(fragCoord + mytimer, octaves, lacunarity, gain, offset, distortion );
    randomNumber = clamp(randomNumber, 0.0, 1.0);

    // Use random number for fragment color (for demonstration)
    var color: vec3<f32> = vec3<f32>(randomNumber);

    // Height plot for a single slice of the noise
    let lineThickness = 0.002; // thickeness line for the noise
    let lineHeight    = 0.8;   // max line height half screen height
    let lineSlice     = 0.2;   // cut across the noise at 0.2 value

    let x = fragCoord.x;
    var y = fbnspin( vec2(x, lineSlice) + mytimer, octaves, lacunarity, gain, offset, distortion   );
    y = clamp( y, 0.0, 1.0 ) * lineHeight;

    if ( length( fragCoord - vec2<f32>(x,y) ) < lineThickness )
    {
        color = vec3<f32>(1,0,0);
    }

    // Output final color
    return vec4<f32>(color, 1.0);
}
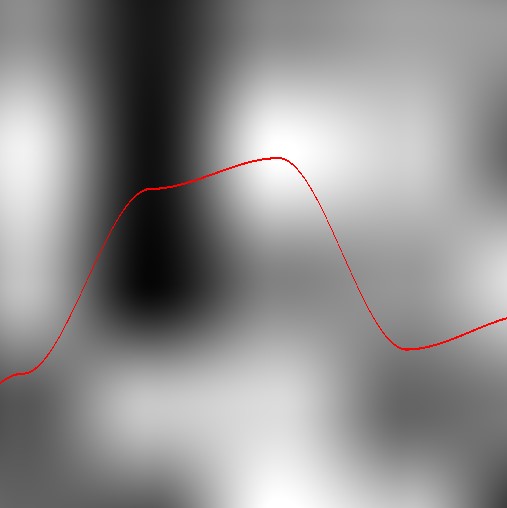
Example output for the fbnspin function using the default values above in the code.
Spin componet to the fbn noise function.
Random Marble Function
Write a marble function to create those swirly patterns you see in marble stone!
fn warpedMarbleNoise(
    position: vec2<f32>,
    octaves: u32,
    lacunarity: f32,
    gain: f32,
    offset: f32,
    distortion: vec2<f32>,
    scale: f32,         // Controls the primary sine frequency
    intensity: f32,     // Controls vein contrast
    warpIntensity: f32, // Strength of the domain warping
    warpScale: f32      // Scale of the warp noise
) -> f32 {
    // Step 1: Generate warp distortion using noise
    let warpOffset = vec2<f32>(
        fbnspin(position * warpScale, octaves, lacunarity, gain, offset, distortion),
        fbnspin(position.yx * warpScale, octaves, lacunarity, gain, offset, distortion)
    );

    // Step 2: Apply warp to position
    let warpedPosition = position + warpIntensity * warpOffset;

    // Step 3: Generate base fractal noise
    let baseNoise = fbnspin(warpedPosition, octaves, lacunarity, gain, offset, distortion);

    // Step 4: Apply sine wave for marble pattern
    let marbleValue = sin(warpedPosition.x * scale + intensity * baseNoise);

    // Normalize result to [0, 1] range
    return 0.5 + 0.5 * marbleValue;
}
This is the updated fragment shader with the default parameters for the marble effect.
@fragment
fn main(@location(0) fragCoord : vec2<f32>) -> @location(0) vec4<f32>
{
    let octaves:u32    = 5;
    let lacunarity:f32 = 2.0;
    let gain:f32       = 0.5;
    let offset:f32     = 1.2;
    let distortion:vec2<f32> = vec2(0.1, 0.1);
    let scale = 3.0;
    let intensity = 5.0;
    let warpIntensity = 2.0;  // Warp intensity (strength of swirls)
    let warpScale = 0.5;                // Warp scale (frequency of the warp noise)

    var randomNumber = warpedMarbleNoise(fragCoord + mytimer, octaves, lacunarity, gain, offset, distortion, scale, intensity, warpIntensity, warpScale );
    randomNumber = clamp(randomNumber, 0.0, 1.0);

    // Use random number for fragment color (for demonstration)
    var color: vec3<f32> = vec3<f32>(randomNumber);

    // Height plot for a single slice of the noise
    let lineThickness = 0.05; // thickeness line for the noise
    let lineHeight    = 0.8;   // max line height half screen height
    let lineSlice     = 0.2;   // cut across the noise at 0.2 value

    let x = fragCoord.x;
    var y = warpedMarbleNoise( vec2(x, lineSlice) + mytimer, octaves, lacunarity, gain, offset, distortion, scale, intensity, warpIntensity, warpScale   );
    y = clamp( y, 0.0, 1.0 ) * lineHeight;

    if ( length( fragCoord - vec2<f32>(x,y) ) < lineThickness )
    {
        color = vec3<f32>(1,0,0);
    }

    // Output final color
    return vec4<f32>(color, 1.0);
}
Combining fbn noise with a circular spin to amplify the pattern to produce a marble-like effect.
Simplify Marble Noise
Simplify the marble noise function to use the base
fbn(..)
function (instead of the swirl version) - and still produces good results.
fn warpedMarbleNoise(
    position: vec2<f32>,
    octaves: u32,
    lacunarity: f32,
    gain: f32,
    scale: f32,         // Controls the primary sine frequency
    intensity: f32,     // Controls vein contrast
    warpIntensity: f32, // Strength of the domain warping
    warpScale: f32      // Scale of the warp noise
) -> f32 {
    // Step 1: Generate warp distortion using noise
    let warpOffset = vec2<f32>(
        fbn(position * warpScale, octaves, lacunarity, gain),
        fbn(position.yx * warpScale, octaves, lacunarity, gain)
    );

    // Step 2: Apply warp to position
    let warpedPosition = position + warpIntensity * warpOffset;

    // Step 3: Generate base fractal noise
    let baseNoise = fbn(warpedPosition, octaves, lacunarity, gain);

    // Step 4: Apply sine wave for marble pattern
    let marbleValue = sin(warpedPosition.x * scale + intensity * baseNoise);

    // Normalize result to [0, 1] range
    return 0.5 + 0.5 * marbleValue;
}
The following gives the fractal with the default parameters:
@fragment
fn main(@location(0) fragCoord : vec2<f32>) -> @location(0) vec4<f32>
{
    let octaves:u32    = 8;
    let lacunarity:f32 = 3.0;
    let gain:f32       = 0.1;
    let scale          = 2.0;
    let intensity = 1.0;
    let warpIntensity = 2.0;    // Warp intensity (strength of swirls)
    let warpScale = 1.0;       // Warp scale (frequency of the warp noise)

    var randomNumber = warpedMarbleNoise(fragCoord, octaves, lacunarity, gain, scale, intensity, warpIntensity, warpScale );
    randomNumber = clamp(randomNumber, 0.0, 1.0);

    // Use random number for fragment color (for demonstration)
    var color: vec3<f32> = vec3<f32>(randomNumber);

    // Height plot for a single slice of the noise
    let lineThickness = 0.05; // thickeness line for the noise
    let lineHeight    = 0.8;   // max line height half screen height
    let lineSlice     = 0.2;   // cut across the noise at 0.2 value

    let x = fragCoord.x;
    var y = warpedMarbleNoise( vec2(x, lineSlice), octaves, lacunarity, gain, scale, intensity, warpIntensity, warpScale   );
    y = clamp( y, 0.0, 1.0 ) * lineHeight;

    if ( length( fragCoord - vec2<f32>(x,y) ) < lineThickness )
    {
        color = vec3<f32>(1,0,0);
    }

    // Output final color
    return vec4<f32>(color, 1.0);
}
Simpler marble function with only an fbn (not fbnswirl).
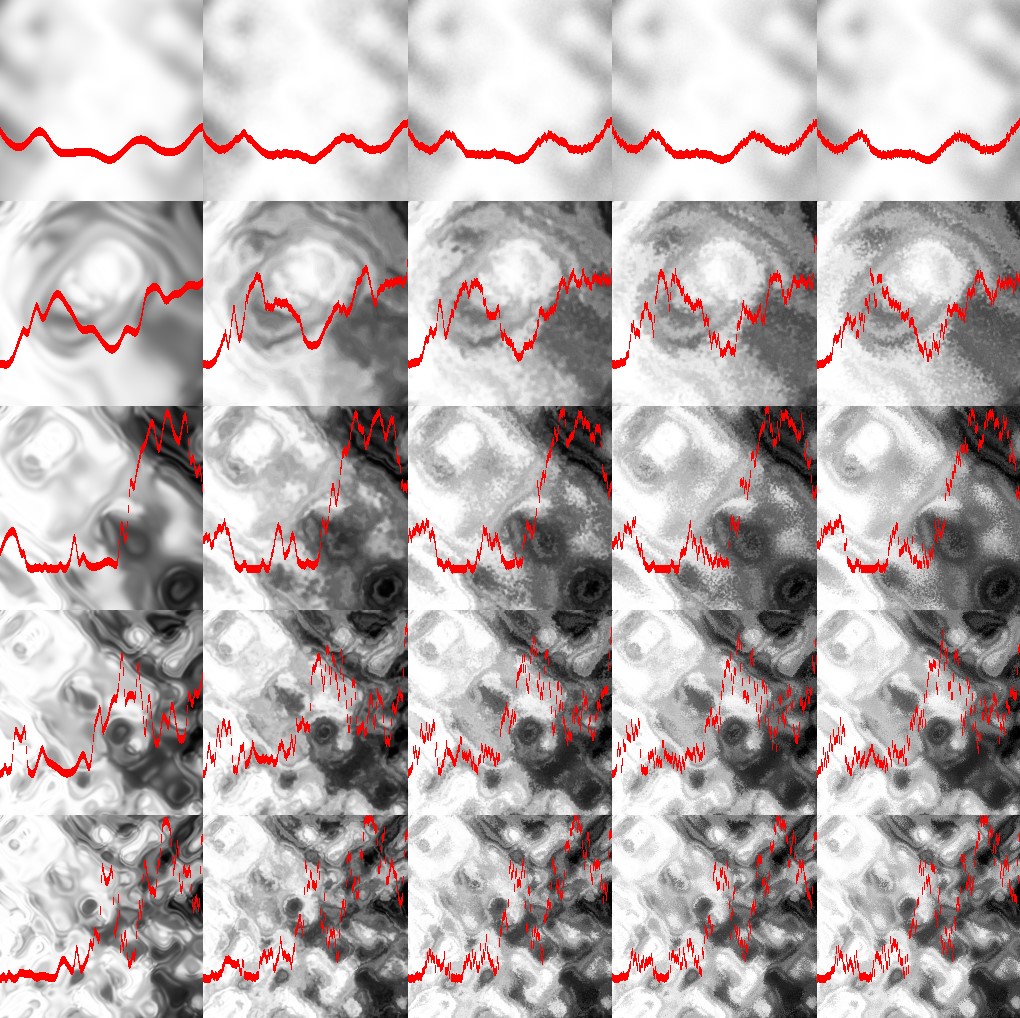
Grid of Parameters
As you can see, there is lots of paramters for controlling the noise - a nice way to see how the varying parameters compare and procude different effects is to create a grid. Vary one parameter along the x-axis and vary another parameter along the y-axis so you can see how the output changes.
We create a
submain(..)
function - which we call from
main(..)
in the fragment shader - the
submain
is for the cells - with repeating uv coordinates that go from 0 to 1 for each cell. Draw the same noise pattern agan and again but at differnet loacatios with different parameters.
// Submain function (subgrid with its own 0-1 uv range, called subst)
fn submain(st: vec2<f32>, subst: vec2<f32>, x:u32, y:u32, num:u32) -> vec3<f32>
{
    // different parameters for each 'cell'
    let ix = f32(x)/f32(num);
    let iy = f32(y)/f32(num);

    let octaves:u32    = 8;
    let lacunarity:f32 = 3.0;
    let gain:f32       = 0.1;
    let scale          = 2.0;
    let intensity      = 1.0;
    let warpIntensity  = 0.0 + 2.0*ix;    // Warp intensity (strength of swirls)
    let warpScale      = 0.0 + 2.0*iy;    // Warp scale (frequency of the warp noise)

    var randomNumber = warpedMarbleNoise(subst, octaves, lacunarity, gain, scale, intensity, warpIntensity, warpScale );

    randomNumber = clamp(randomNumber, 0.0, 1.0);

    // Use random number for fragment color (for demonstration)
    var color: vec3<f32> = vec3<f32>(randomNumber);

    return color;
}

@fragment
fn main(@location(0) fragCoord : vec2<f32>) -> @location(0) vec4<f32>
{
    let gridSize = 5.0;
    let cellSize = 1.0 / gridSize;

    // Determine which grid cell the fragment belongs to
    let gridX:f32 = floor(fragCoord.x / cellSize);
    let gridY:f32 = floor(fragCoord.y / cellSize);
    let cellCoord = vec2<f32>(gridX, gridY);

    // Normalize fragment coordinates within the cell (subst)
    let subst = (fragCoord % cellSize) / cellSize;

    // Call the submain function for the current cell
    let color = submain(cellCoord, subst, u32(gridX), u32(gridY), u32(gridSize) );

    return vec4(color, 1.0);
}
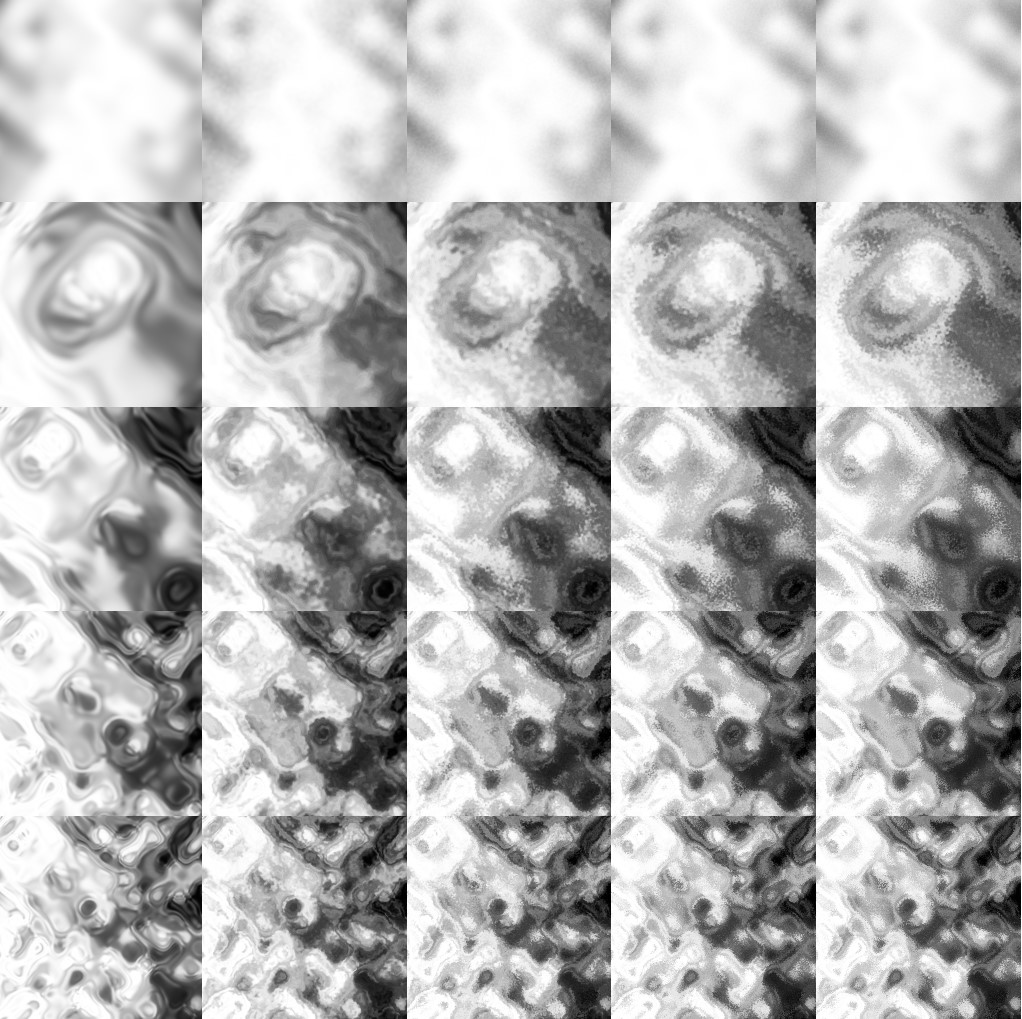
The output looks like this for a 5x5 grid of noise patterns.
Comparison of varying the warpIntensity and warpScale values from 0 to 2.0 in a 5x5 grid (top left is 0,0) and the bottom right is (2,2).
Vary lacunarity agains warpScale
Create another grid but using the
lacunarity
and
warpScale
.
These are the default parameters and value (lacunarity goes from 0 to 32 and warpScale from 0 to 2).
<?php
    let octaves:u32    = 8;
    let lacunarity:f32 = 0 + 32.0*ix;
    let gain:f32       = 0.1;
    let scale          = 2.0;
    let intensity      = 1.0;
    let warpIntensity  = 1.0;             // Warp intensity (strength of swirls)
    let warpScale      = 0.0 + 2.0*iy;    // Warp scale (frequency of the warp noise)
Comparison of varying lacunarity against warpScale.
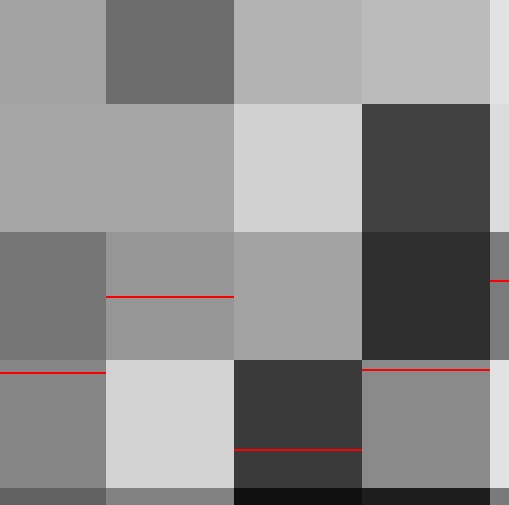
Plot Height Slice in SubCells
We can also add in the code from earlier to draw the height information using a slice of the random noise (1d view of the noise isntead of the 2d).
Add in the extra code to the bottom of the
submain(..)
like this:
fn submain(st: vec2<f32>, subst: vec2<f32>, xx:u32, yy:u32, num:u32) -> vec3<f32>
{
    // different parameters for each 'cell'
    let ix = f32(xx)/f32(num);
    let iy = f32(yy)/f32(num);

    let octaves:u32    = 8;
    let lacunarity:f32 = 0 + 32.0*ix;
    let gain:f32       = 0.1;
    let scale          = 2.0;
    let intensity      = 1.0;
    let warpIntensity  = 1.0;             // Warp intensity (strength of swirls)
    let warpScale      = 0.0 + 2.0*iy;    // Warp scale (frequency of the warp noise)

    var randomNumber = warpedMarbleNoise(subst, octaves, lacunarity, gain, scale, intensity, warpIntensity, warpScale );

    randomNumber = clamp(randomNumber, 0.0, 1.0);

    // Use random number for fragment color (for demonstration)
    var color: vec3<f32> = vec3<f32>(randomNumber);

    // Plot the height in the subgrid

    // Height plot for a single slice of the noise
    let lineThickness = 0.02; // thickeness line for the noise
    let lineHeight    = 0.8;   // max line height half screen height
    let lineSlice     = 0.2;   // cut across the noise at 0.2 value

    let x = subst.x;
    var y = warpedMarbleNoise( vec2(x, lineSlice), octaves, lacunarity, gain, scale, intensity, warpIntensity, warpScale   );
    y = clamp( y, 0.0, 1.0 ) * lineHeight;

    if ( length( subst - vec2<f32>(x,y) ) < lineThickness )
    {
        color = vec3<f32>(1,0,0);
    }

    return color;
}
Overlay the height plot for a 1d noise slice.
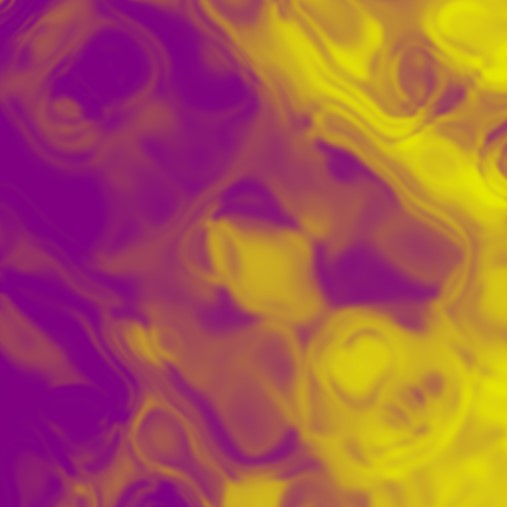
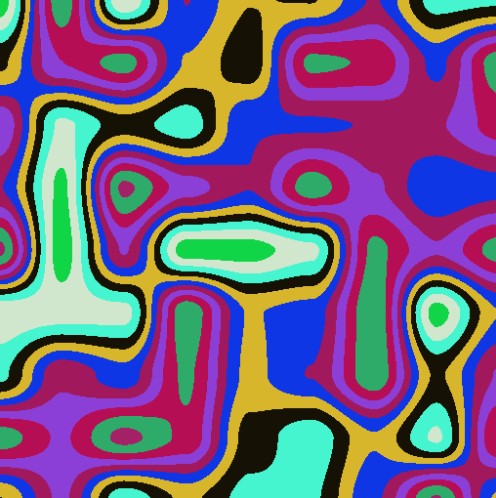
Color Marble
We've just been focusing on the noise pattern - with no color! If we want a marble like color pattern - this don't just want random rgb values - instead the marble color varies between two colors - use the random value as the blend factor!
Mix in a bit of color with the random marble pattern - so it isn't so 'black and white' :)
@fragment
fn main(@location(0) fragCoord : vec2<f32>) -> @location(0) vec4<f32>
{
    let octaves:u32    = 8;
    let lacunarity:f32 = 2.0;
    let gain:f32       = 0.1;
    let scale          = 2.0;
    let intensity      = 1.0;
    let warpIntensity  = 1.0;
    let warpScale      = 1.0;

    var randomNumber = warpedMarbleNoise(fragCoord, octaves, lacunarity, gain, scale, intensity, warpIntensity, warpScale );

    randomNumber = clamp(randomNumber, 0.0, 1.0);

    var color = mix(vec3<f32>(0.9, 0.9, 0.0), vec3<f32>(0.5, 0.0, 0.5), vec3(randomNumber) );

    return vec4(color, 1.0);
}
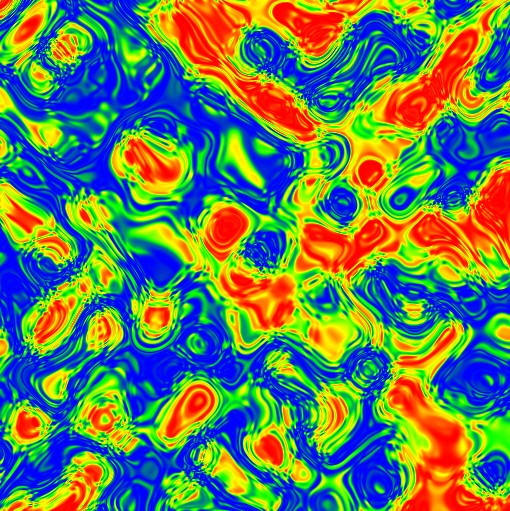
Color Gradients
Instead of just 2 colors - you can also use color functoins to map the value of 0 to 1 to a rainbow (e.g., blue, green, orange, ...red).
Color gradient function for the random noise values.
fn heatGradient(value: f32) -> vec3<f32> {
    // Clamp the input value to the range [0, 1]
    let v = clamp(value, 0.0, 1.0);

    // Define key points in the gradient
    if (v < 0.25) {
        // Blue to Green (0.0 - 0.25)
        let t = v / 0.25;
        return mix(vec3<f32>(0.0, 0.0, 1.0), vec3<f32>(0.0, 1.0, 0.0), t);
    } else if (v < 0.5) {
        // Green to Yellow (0.25 - 0.5)
        let t = (v - 0.25) / 0.25;
        return mix(vec3<f32>(0.0, 1.0, 0.0), vec3<f32>(1.0, 1.0, 0.0), t);
    } else if (v < 0.75) {
        // Yellow to Orange (0.5 - 0.75)
        let t = (v - 0.5) / 0.25;
        return mix(vec3<f32>(1.0, 1.0, 0.0), vec3<f32>(1.0, 0.5, 0.0), t);
    } else {
        // Orange to Red (0.75 - 1.0)
        let t = (v - 0.75) / 0.25;
        return mix(vec3<f32>(1.0, 0.5, 0.0), vec3<f32>(1.0, 0.0, 0.0), t);
    }
}

@fragment
fn main(@location(0) fragCoord : vec2<f32>) -> @location(0) vec4<f32>
{
    let octaves:u32    = 4;
    let lacunarity:f32 = 1.0;
    let gain:f32       = 0.2;
    let scale          = 1.7;
    let intensity      = 2.0;
    let warpIntensity  = 3.0;
    let warpScale      = 1.6;

    var randomNumber = warpedMarbleNoise(fragCoord, octaves, lacunarity, gain, scale, intensity, warpIntensity, warpScale );

    randomNumber = clamp(randomNumber, 0.0, 1.0);

    var color = heatGradient( randomNumber );

    return vec4(color, 1.0);
}
Color gradient functions are very useful in data analysis for identifying problem areas and to quickly see the distribution/gradients. As using a grayscale it's difficult to see the minimum and maximum values of various areas (as it's hard to see if it's very dark gray or black). The color range easily lets us see which areas sit within which ranges (blue as 0 in this case and red as the maximum 1).
Focusing on SWIRLING
Let's take a step back and just look at swirling - and combining it with noise in different ways.
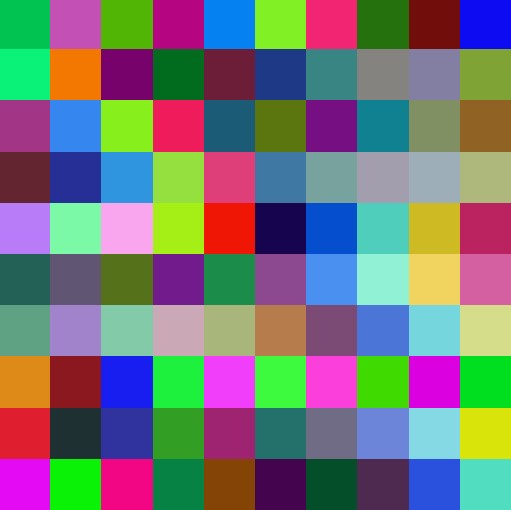
So that we have a point of reference - let's create a pattern function - creates color squares - so we can see how much the swirl is impacting the underlying image (layer we'll swap this out for noise).
fn squarePattern(uv: vec2<f32>) -> vec3<f32> {
    let gridSize: f32 = 10.0;

    // Calculate the grid cell position
    let cell = vec2<u32>( abs(uv) * gridSize);
    // Create a unique index for the cell
    let index = cell.x + cell.y * u32(gridSize);

    return vec3( random( vec2( f32(index  ) ) ),
                 random( vec2( f32(index+1) ) ),
                 random( vec2( f32(index+2) ) ) );
}
The uv coordinates in the squarePattern are 'abs' so that the pattern works outside of the uv range (even for negative values). Without the abs(uv) the negative coordinates don't repeat.
This produces the following tidy pattern (screen of diffent color squares).
Random color squares.
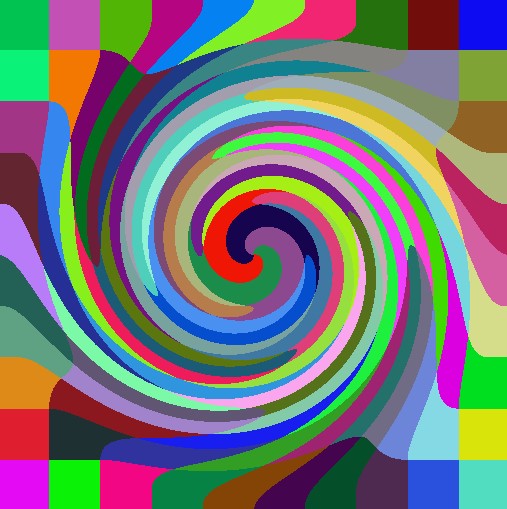
Simple swirl around the middle of the screen.
@fragment
fn main(@location(0) uvs    : vec2<f32>) -> @location(0) vec4<f32>
{
  var center  = vec2<f32>(0.5, 0.5);
  var texSize = vec2<f32>(1.001, 1.001);
  var tc = uvs * texSize;
  tc = tc - center;

  var radius = 0.1 + mytimer;
  var angle = 1.2;

  var dist = length(tc);
  if (dist < radius)
  {
    var percent = (radius - dist) / radius;
    var theta = percent * percent * angle * 8.0;
    var s = sin(theta);
    var c = cos(theta);
    tc = vec2<f32>(dot(tc, vec2<f32>(c, -s)), dot(tc, vec2<f32>(s, c)));
  }
  tc = tc + center;

  var coord = tc / texSize;
  var color = squarePattern(coord );

  return vec4<f32>(color.xyz, 1.0);
}
The swirly pattern is updated using the
mytimer
value which impacts the radius of the swirl - so as the radius grows you can see the swirl increase. As shown below.
Distoring the image pattern in a swirly motion.
Random Radius
Take the previous example but this time, we'll mix in some randomness with the radius distance - instead of it being constant we'll change it using a smooth noise function from earlier.
Step one - create random noise pattern using fixed radius of 0.5.
Swirl pattern with a fixed radius of 0.5.
@fragment
fn main(@location(0) uvs    : vec2<f32>) -> @location(0) vec4<f32>
{
  var center  = vec2<f32>(0.5, 0.5);
  var texSize = vec2<f32>(1.001, 1.001);
  var tc = uvs * texSize;
  tc = tc - center;

  var radius = 0.5;
  var angle = 1.2;

  var dist = length(tc);
  if (dist < radius)
  {
    var percent = (radius - dist) / radius;
    var theta = percent * percent * angle * 8.0;
    var s = sin(theta);
    var c = cos(theta);
    tc = vec2<f32>(dot(tc, vec2<f32>(c, -s)), dot(tc, vec2<f32>(s, c)));
  }
  tc = tc + center;

  var coord = tc / texSize;
  var color = squarePattern(coord );

  return vec4<f32>(color.xyz, 1.0);
}
Step Two - multiply the fixed radius by the smoothed noise function.
Smoothed noise for the radius distance instead of a fixed.
@fragment
fn main(@location(0) uvs    : vec2<f32>) -> @location(0) vec4<f32>
{
  var center  = vec2<f32>(0.5, 0.5);
  var texSize = vec2<f32>(1.001, 1.001);
  var tc = uvs * texSize;
  tc = tc - center;

  var radius = 0.5 + randomsmooth(2.0 * uvs);
  var angle = 1.2;

  var dist = length(tc);
  if (dist < radius)
  {
    var percent = (radius - dist) / radius;
    var theta = percent * percent * angle * 8.0;
    var s = sin(theta);
    var c = cos(theta);
    tc = vec2<f32>(dot(tc, vec2<f32>(c, -s)), dot(tc, vec2<f32>(s, c)));
  }
  tc = tc + center;

  var coord = tc / texSize;
  var color = squarePattern(coord );

  return vec4<f32>(color.xyz, 1.0);
}
Random Position for Swirl
Instead of randomizing the radius - we can keep the
dist
variable fixed and modify the centre location (currently
(0.5,0.5)
). Use the same
randomsmooth(..)
function so the center is randomized and see the pattern we get.
Randomize the position using a smoothnoise function.
@fragment
fn main(@location(0) uvs    : vec2<f32>) -> @location(0) vec4<f32>
{
  var center  = vec2<f32>(0.5, 0.5);

  center = vec2<f32>( randomsmooth(1.0 * uvs),
                      randomsmooth(1.0 * (uvs + vec2(0.328903232)) ) );

  var texSize = vec2<f32>(1.001 );
  var tc = uvs * texSize;
  tc = tc - center;

  var radius = 1.0;
  var angle = 0.2;

  var dist = length(tc);
  if (dist < radius)
  {
    var percent = (radius - dist) / radius;
    var theta = percent * percent * angle * 8.0;
    var s = sin(theta);
    var c = cos(theta);
    tc = vec2<f32>(dot(tc, vec2<f32>(c, -s)), dot(tc, vec2<f32>(s, c)));
  }
  tc = tc + center;

  var coord = tc / texSize;
  var color = squarePattern(coord );

  return vec4<f32>(color.xyz, 1.0);
}
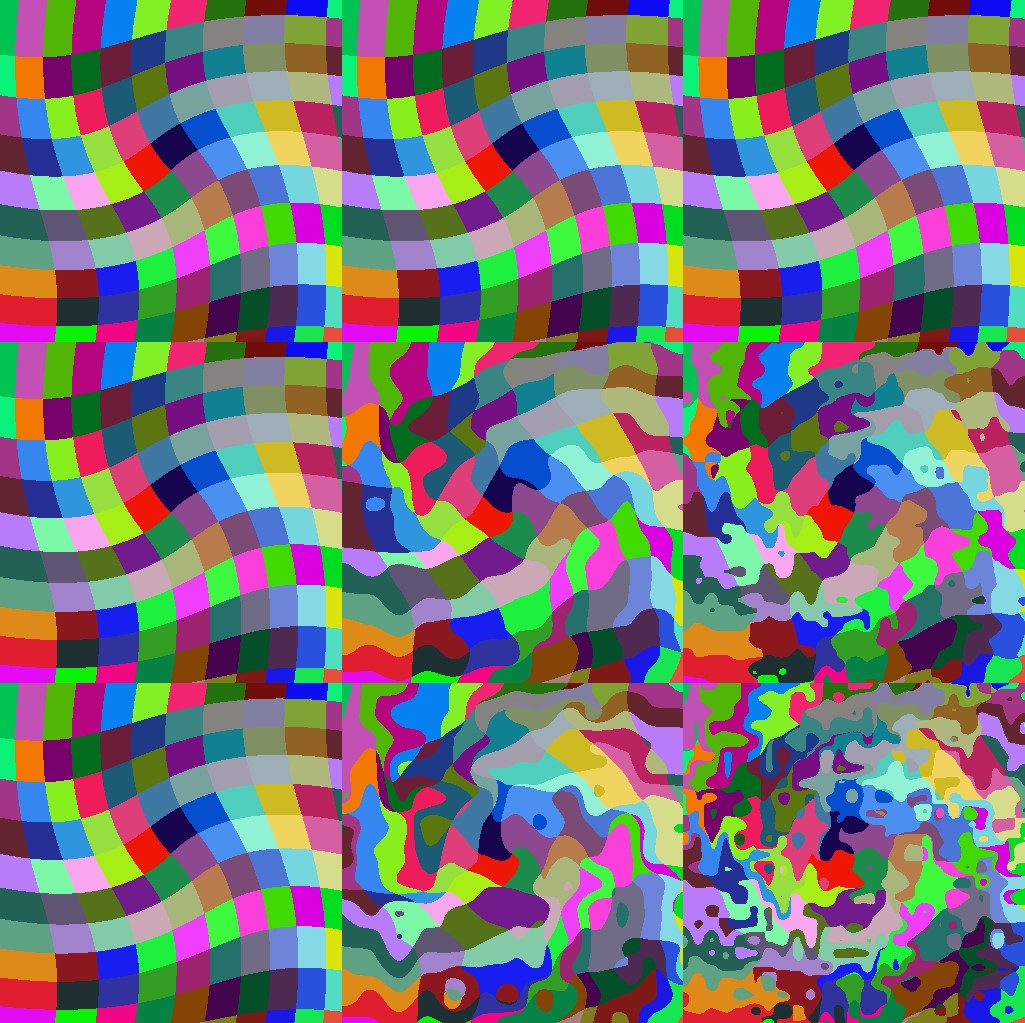
Create a Table Comparing Parameters (Swirl)
As we did earlier, let's create a 3x3 grid of outputs - for each output change the parameter. We'll modify one parameter (the angle) - changing it by both amplitude and frequency. Horizontal will be the frequency while the vertical will be the amplitude.
Randomizing the swirl angle - comparing the deviation in frequency and amplitude.
// Submain function (subgrid with its own 0-1 uv range, called subst)
fn submain(st: vec2<f32>, subst: vec2<f32>, xx:u32, yy:u32, num:u32) -> vec3<f32>
{
    let dx = f32(xx)/f32(num+1);
    let dy = f32(yy)/f32(num+1);

    var center  = vec2<f32>(0.5, 0.5);

    var texSize = vec2<f32>(1.001 );
    var tc = subst * texSize;
    tc = tc - center;

    var radius = 1.0;
    var angle  = 0.1 + dy*0.5 * randomsmooth( dx * 12.0 * subst);

    var dist = length(tc);
    if (dist < radius)
    {
      var percent = (radius - dist) / radius;
      var theta = percent * percent * angle * 8.0;
      var s = sin(theta);
      var c = cos(theta);
      tc = vec2<f32>(dot(tc, vec2<f32>(c, -s)), dot(tc, vec2<f32>(s, c)));
    }
    tc = tc + center;

    var coord = tc / texSize;
    var color = squarePattern( coord );

    return color.xyz;
}


@fragment
fn main(@location(0) fragCoord : vec2<f32>) -> @location(0) vec4<f32>
{
    let gridSize = 3.0;
    let cellSize = 1.0 / gridSize;

    // Determine which grid cell the fragment belongs to
    let gridX:f32 = floor(fragCoord.x / cellSize);
    let gridY:f32 = floor(fragCoord.y / cellSize);
    let cellCoord = vec2<f32>(gridX, gridY);

    // Normalize fragment coordinates within the cell (subst)
    let subst = (fragCoord % cellSize) / cellSize;

    // Call the submain function for the current cell
    let color = submain(cellCoord, subst, u32(gridX), u32(gridY), u32(gridSize) );

    return vec4(color, 1.0);
}
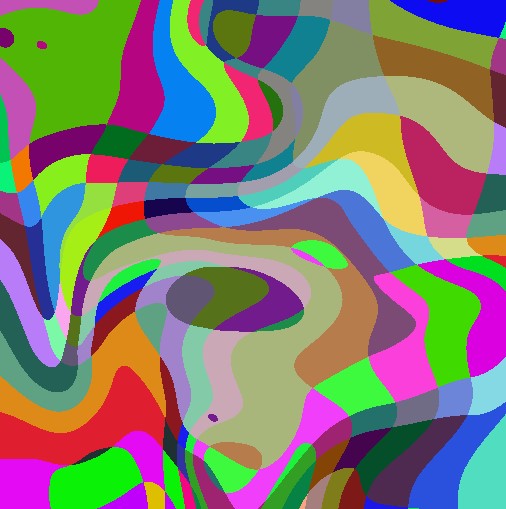
Levels or Rotation
The fbn function as inspiration - which combines multiple layers of noise - but each layer has a different scale/frequency - we can do a simple version of this using matrix rotations.
Combining multiple rotations to add detail to the twisty noise effect.
The different levels of rotation are scaled so that we can add levels of detail to the twistly swirly pattern. With the larger amplitudes creating the larger swirls, while smaller amplitudes with higher frequency create the smaller swirls on top.
@fragment
fn main(@location(0) fragCoord : vec2<f32>) -> @location(0) vec4<f32>
{
    let dt = mytimer * 1.0;

    let ang1 = 0.4 * randomsmooth( 2.5 * fragCoord + dt );
    let m1 = mat2x2<f32>(cos(ang1), -sin(ang1), sin(ang1), cos(ang1));

    let ang2 = 0.1 * randomsmooth( 6.0 * fragCoord + dt );
    let m2 = mat2x2<f32>(cos(ang2), -sin(ang2), sin(ang2), cos(ang2));

    let ang3 = 0.05 * randomsmooth( 12.0 * fragCoord + dt );
    let m3 = mat2x2<f32>(cos(ang3), -sin(ang3), sin(ang3), cos(ang3));

    let octaves:u32    = 8;
    let lacunarity:f32 = 128.0;
    let gain:f32       = 0.01;

    var c = fbn(      1.0  * fragCoord * m1 +
                      0.6  * fragCoord * m2 +
                      0.2 * fragCoord * m3,
                             octaves, lacunarity, gain ) * 0.8;

     return vec4(c, c, c, 1.0);
}
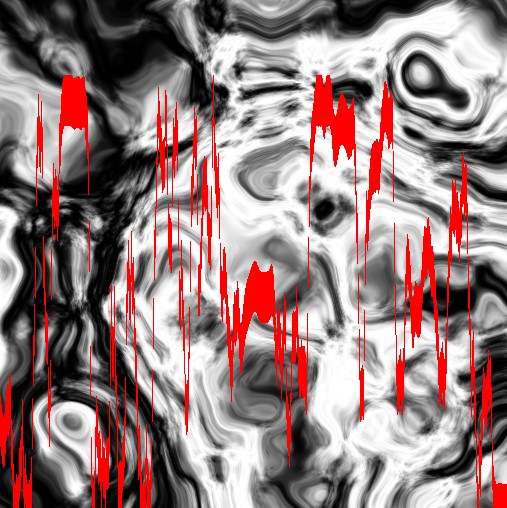
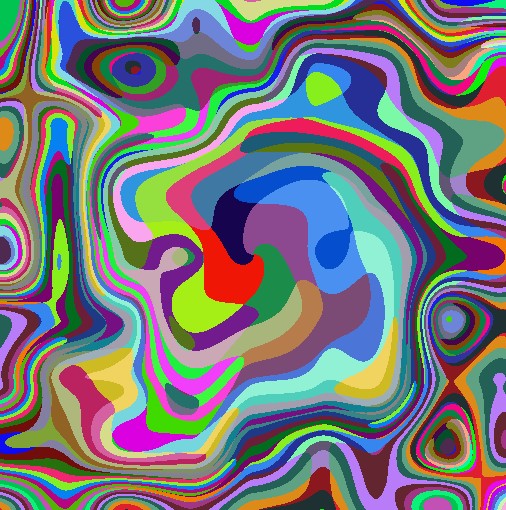
Hipnotic Noise Break
Just at this point - let's throw in some random values and make them large! So the pattern noise is hit by all sorts of issues - too much detail in too few pixels - creating a mesmorizong mess that you can't stop looking at!
Going crazy with noise.
@fragment
fn main(@location(0) fragCoord : vec2<f32>) -> @location(0) vec4<f32>
{
    let dt = mytimer * 1.0;

    let ang1 = 10.0 * randomsmooth( 0.1 * fragCoord + dt );
    let m1 = mat2x2<f32>(cos(ang1), -sin(ang1), sin(ang1), cos(ang1));

    let ang2 = 10.0 * randomsmooth( 1.0 * fragCoord + dt );
    let m2 = mat2x2<f32>(cos(ang2), -sin(ang2), sin(ang2), cos(ang2));

    let ang3 = 1.0 * randomsmooth( (3.0) * fragCoord + dt );
    let m3 = mat2x2<f32>(cos(ang3), -sin(ang3), sin(ang3), cos(ang3));

    let octaves:u32    = 8;
    let lacunarity:f32 = 128.0;
    let gain:f32       = 0.01;

    var c = fbn(   10.0*   1.0  * fragCoord * m1 +
                   10.0*   1.0  * fragCoord * m2 +
                   35.0*   1.0 * fragCoord * m3,
                             octaves, lacunarity, gain ) * 0.8;

     return vec4(c, c, c, 1.0);
}
The noise to me feels painful to watch - it has a rythmic sub-pattern that you can make out - but it feels uncomofortable - like scratching your finger nails on a chalk board.
More Crazy Noise Patterns
Continuing with the experimental noise patterns - we can also mix the smooth noise with the square texture pattern we created for testing.
The uv coordinate are taken from the smooth random noise function - we also add a timer offset so it can be animated! Creating a hypnotic pattern seems to never end.
Random texture coordinates for the grid texture pattern.
@fragment
fn main(@location(0) fragCoord : vec2<f32>) -> @location(0) vec4<f32>
{
    var st = vec2( randomsmooth( vec2(2.0 * fragCoord ) ) ) + mytimer;

    var color = squarePattern( st );

    return vec4(color, 1.0);
}
Beyond Standard Noise (Voronoi)
At this point, we've just been using basic smoothed noise in various ways (e.g., scaling it, twisting it, stacking it and so on). Now it's time to look at a few other noise functions.
Voronoinoise function output.
We define a
voronoinoise(..)
function - which works similar to the previous noise functions - pass in a 2d seed and it generates a random number.
fn voronoinoise( point:vec2<f32> ) -> f32
{
    var p:vec2<f32> = floor( point * 4.0 );
    var f:vec2<f32> = fract( point * 4.0 );
    var res = 0.0;
    for( var j:i32 = -1; j<=1; j++ ) {
        for( var i:i32 = -1; i<=1; i++ ) {
            var b = vec2<f32>( f32(i), f32(j) );
            var r = vec2<f32>( b ) - f + random( p + b);
            res += 1./pow(dot(r,r),8.);
        }
    }
    return pow(1./res, 0.0625);
}

@fragment
fn main(@location(0) fragCoord : vec2<f32>) -> @location(0) vec4<f32>
{
    var randomNumber = voronoinoise( fragCoord );

    var color = vec3<f32>( randomNumber );

    return vec4(color, 1.0);
}
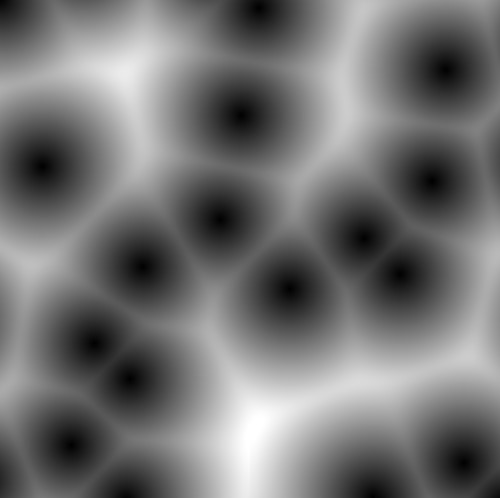
Worley Noise
Worley Noise, also known as Cellular Noise, generates a pattern based on the distance to the nearest feature points, creating organic, cell-like structures.
Compared to the previous noise pattern - Voronoi Noise, on the other hand, divides space into regions based on the closest distance to a set of seed points, producing a tessellated pattern similar to a mosaic.
Worley noise generator output.
fn worleyNoise(coord: vec2<f32>) -> f32 {
    var minDist: f32 = 1e9;
    var featurePoint: vec2<f32>;

    // Generate feature points and calculate distance
    for (var i: i32 = -1; i <= 1; i = i + 1) {
        for (var j: i32 = -1; j <= 1; j = j + 1) {
            featurePoint = floor(coord) + vec2<f32>(f32(i), f32(j)) + fract(sin(vec2<f32>(dot(floor(coord) + vec2<f32>(f32(i), f32(j)), vec2<f32>(12.9898, 78.233))) * 43758.5453));
            var dist: f32 = length(coord - featurePoint);
            if (dist < minDist) {
                minDist = dist;
            }
        }
    }
    return minDist;
}


@fragment
fn main(@location(0) fragCoord : vec2<f32>) -> @location(0) vec4<f32>
{
    var randomNumber = worleyNoise( fragCoord * 4.0 );

    var color = vec3<f32>( randomNumber );

    return vec4(color, 1.0);
}
Gabor Noise
Gabor noise is a bit different as it's a type of procedural texture. It gets the name, as it uses Gabor filters, which are wavelets with a Gaussian envelope, to create smooth and continuous noise patterns.
The output for Gabor noise is a highly detailed, anisotropic textures that can simulate natural phenomena like wood grain or turbulence.
Gabar noise pattern for a frequency of 10 and a sigma of 0.5.
fn gaborNoise(coord: vec2<f32>, frequency: f32, sigma: f32) -> f32 {
    var noise: f32 = 0.0;
    let PI: f32 = 3.141592653589793;

    for (var i: i32 = -1; i <= 1; i = i + 1) {
        for (var j: i32 = -1; j <= 1; j = j + 1) {
            // Create a random direction and phase
            var theta: f32 = 2.0 * PI * fract(sin(dot(floor(coord) + vec2<f32>(f32(i), f32(j)), vec2<f32>(12.9898, 78.233))) * 43758.5453);
            var phase: f32 = 2.0 * PI * fract(sin(dot(floor(coord) + vec2<f32>(f32(i) + 0.5, f32(j) + 0.5), vec2<f32>(12.9898, 78.233))) * 43758.5453);
            var offset: vec2<f32> = vec2<f32>(cos(theta), sin(theta));

            // Calculate the Gabor kernel
            var x: vec2<f32> = coord - (floor(coord) + vec2<f32>(f32(i), f32(j)));
            var r: f32 = length(x);
            var gabor: f32 = exp(-r * r / (2.0 * sigma * sigma)) * cos(2.0 * PI * frequency * dot(offset, x) + phase);

            // Accumulate the noise value
            noise = noise + gabor;
        }
    }
    return noise;
}


@fragment
fn main(@location(0) fragCoord : vec2<f32>) -> @location(0) vec4<f32>
{
    var randomNumber = gaborNoise( fragCoord , 10.0, 0.5 );

    var color = vec3<f32>( randomNumber );

    return vec4(color, 1.0);
}
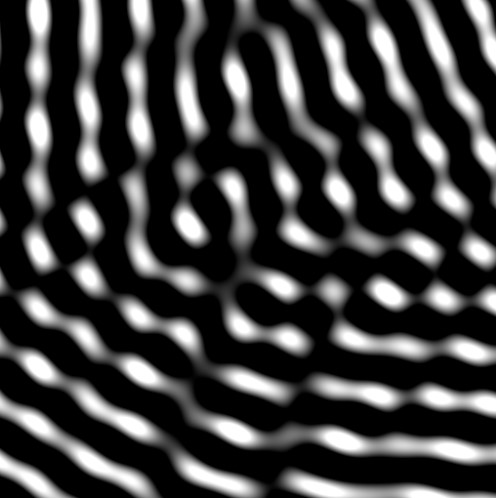
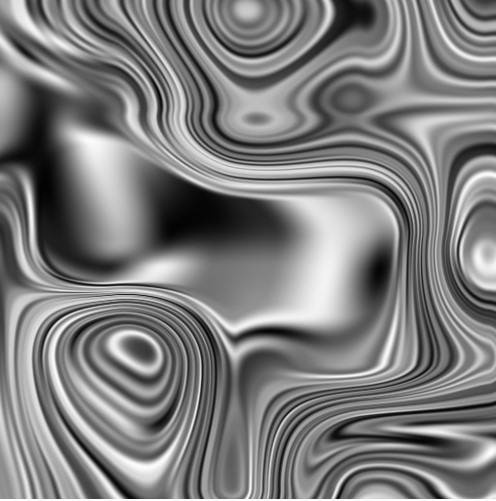
Metalic Noise
The noise pattern gives the feeling that the surface is metalic and reflective.
Metalic noise pattern.
// Metalic noise swirly...
@fragment
fn main(@location(0) uvs    : vec2<f32>) -> @location(0) vec4<f32>
{
  let nn = 1.0/( 0.5 + (randomsmooth( uvs + mytimer*4.0 ))*0.5 );

  var center  = vec2<f32>(0.5*nn, 0.5*nn);
  var texSize = vec2<f32>(1.001, 1.001);
  var tc = ((uvs*(1.0/nn)) % (1.0*nn)  ) * texSize;
  tc = (tc - center);

  var radius = 0.5 + randomsmooth( uvs + mytimer*4.0 );
  var angle = 1.2;

  var dist = length(tc);
  if (dist < radius)
  {
    var percent = (radius - dist) / radius;
    var theta = percent * percent * angle * 8.0;
    var s = sin(theta);
    var c = cos(theta);
    tc = vec2<f32>(dot(tc, vec2<f32>(c, -s)), dot(tc, vec2<f32>(s, c)));
  }
  tc = tc + center;

  var coord = tc / texSize;
  //var color = squarePattern(coord );

  var color = vec3( randomsmooth( coord*4.0 ) );

  return vec4<f32>(color.xyz, 1.0);
}